Best way to fix iPhone 6 Plus reboot repeatedly and unknown error 9
If you want find a better &new supplier for repair iphone in china,you can visit official website:vipprogrammer.com.
In the field of iPhone repairing, if the iPhone 6 Plus reboot repeatedly, this time you should consider fixing the unknown error 9. Use iTunes to root it, it shows unknown error 9, most of this is caused by the CPU and NAND flash. What exactly is it? We need to test it to determine the real problem.
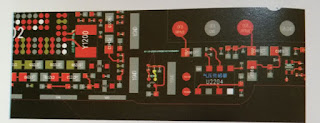
Test the R3017 and R3016, (they are positioned in the point bitmap as follows 3-2-1 and 3-2-2) Normally both of them should be 480. If one or two of them shows 700, then the CPU must broke. After testing, we can found that the AR31 of CPU was disconnected.
3-2-1
3-2-2
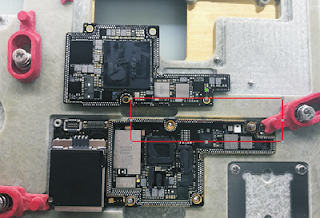
Remove the CPU, and them we found that the motherboard leaking copper. Please don't worry, we can handle it. Use solder iron and solder flux to solder it.
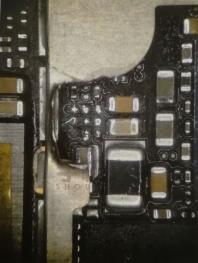
Clean the remaining glue on the solder pad. Pre-heat the motherboard with hot air gun , and then remove the glue with solder iron. In this part, you should do it more carefully, the best way is put solder pad under the microscope, so that you can see it clearly, the picture as shown in 3-2-3.
After cleaning the solder pad, we start to handle the problem of copper leakage (semi-finished as shown in 3-2-4)
Because both of two points are easily disconnected, so we jump wire on AR31 and AP31, as shown in picture 3-2-5 and 3-2-6.
Next we need to remove glue and plant tin on CPU. The method of remove glue is same to process the solder pad, please refer to that method. The lower CPU board must be handled well, because it directly affects the installation of upper CPU board. Carefully check the pins; the level of the protruding pins should be the same. For the novice, it is difficult to plant tin, here are some tips. The most important of plant tin is the location of the CPU and the BGA reballing stencil, you need to target them exactly. Don't shake your hand when you blow it and don't move the stencil, use hot air gun to blow it from one side, in the meantime, keep tin beads in place, don't move and its size should be the same, as shown in picture 3-2-7.
Now assemble the CPU and the upper CPU board. When you finish it, use multimeter to measure the diode data of the Power Drive control IC. When press the power button, the current will be set at 80 MA, then connect to the computer, it will automatically enter DFU mode. We can use these two steps to initially determine if the CPU is installed. On the other side, we need confirm whether the CPU is good by rooting the iPhone which will report unknown error code 4014, and we also need to check the jump wire, if both were around 480,then the wire was mended, as shown is 3-2-8/9.
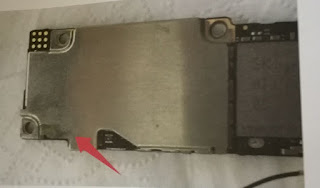
Assemble the upper CPU board and put it under the microscope to check whether all is welded, then connect to the DC supply power to measure the current, the normal current is 450-500MA. If not assemble it well, it will shows large current. After testing, the current is normal. However, when we root it, it is stuck in the Apple LOGO and the progress line doesn't appear, the CPU was hot, there should be somewhere short circuit, so we use rosin method to find the trouble(as shown in 3-2-10), and then fix it.
Finally, all the problem was solved, power on iPhone 6 Plus, it can display the data line. After root it, the iPhone 6 Plus can be turn on successfully.


Comments
Post a Comment